Creative exposure for perfect portraits
Photography-speak can be mind-numbingly technical and leave you more confused than you were before you asked a question. I don't want to do that. I want to show you the secrets of good exposure, how to use your camera's light meter effectively, and motivate you to grab your camera (any camera!) and get shooting. I approach photography writing as if I were speaking to my former self. I figure if I've struggled with something then there has to be someone out there who has too.
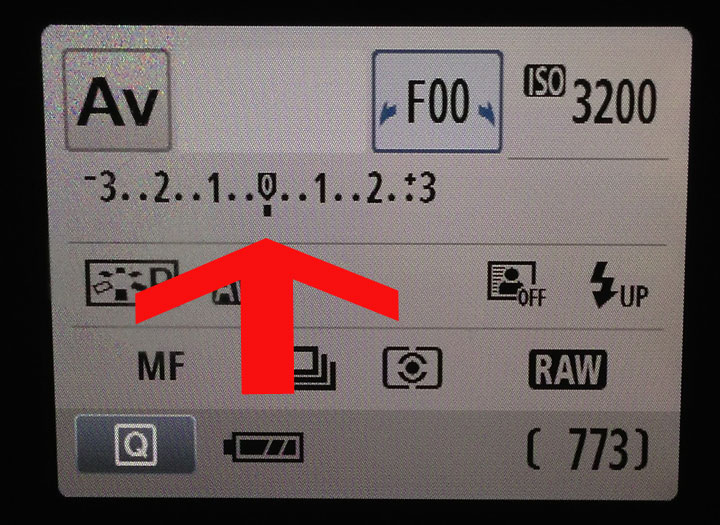
 This is your light meter and a photo of my camera's LCD screen. Please ignore the mess.
Your camera's light meter tells you how much light is coming into your camera. Your meter reading will change depending on the aperture, shutter speed, and ISO settings when you're shooting in manual. Watching the behavior of your light meter as you switch settings is a great way to learn the exposure triangle, which is fancy talk for the way aperture, shutter speed, and ISO affect each other and subsequently your exposure.
Each number represents a full stop. The lines in between are partial stops, also known as exposure level increments. I set my camera to aperture priority (meaning I set a specific aperture that will not change, and the camera automatically sets the shutter speed) before shooting the picture above so that my meter would stop jumping around for the purpose of taking the photo. However, a centered line in the middle does not automatically equal perfect exposure. Universal perfect exposure does not exist.
There is only one perfect exposure and that is the one that you have chosen after giving thought to the kind of image you are trying to create and the message you wish to convey.
The first three photos I'm using in this post are straight out of the camera with the exception of sharpening, resizing, and adding my business watermark. I did no tinkering with exposure, saturation, or anything else.
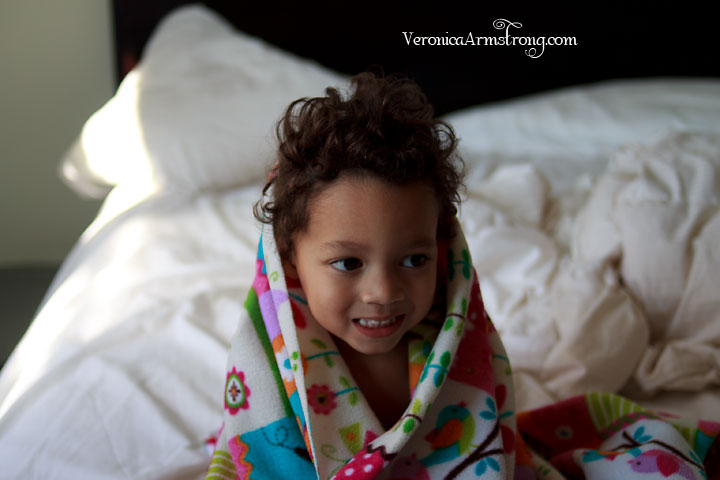
The photo above was dead center on my light meter. Does that shot look perfect to you? Not at all. The top left of the photo is overexposed and Preston's face is underexposed. My son is cute, but the photo is technically unappealing.
This shot was overexposed by half a stop. It's better, but not where I want to be. The top left of the shot is overexposed. The light on his face is more even and there is great light in his eyes, but the shot is still flat. I've learned from trial and error that to get the best exposure for Preston's skin I need to overexpose a full stop.
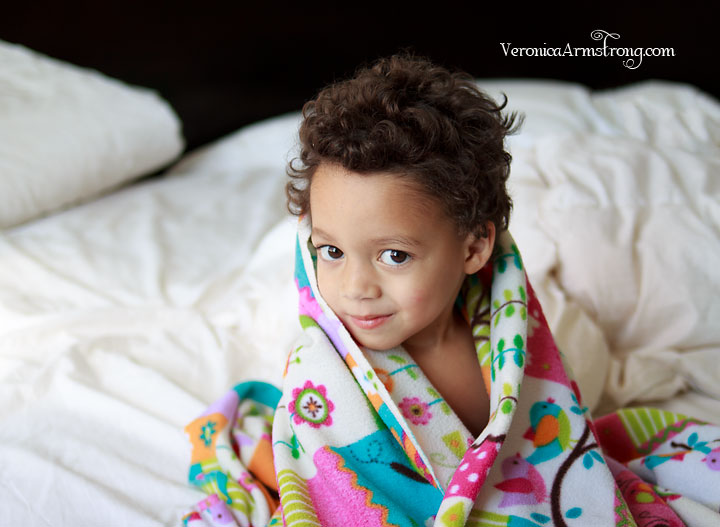
Perfect! I turned a little to avoid the spot on the left that was overexposed and set my meter to overexpose by one full stop. There is a tiny spot that is blown out, meaning overexposed to the point that detail is lost, on the blanket under his left cheek. This is not distracting, though, and doesn't take away from the photo, so I left it alone. This shot is what I was going for. Nice light in his eyes, creamy skin tone, and no loss of important detail.
Photography is a subjective and personal art. What you consider perfect exposure may not be universally accepted. When shooting portraits, I expose for the darkest spot on the face, I like to expose to the right, and my portraits tend to be bright and luminous. Many of my photos are on the brink of overexposure but with no loss of detail. It's my preference, personal style, and can differ depending on subject. Experiment and find your own preference and style. Eventually you'll memorize the right spot to meter for people, objects, or places you shoot often and won't have to spend time experimenting with different exposures.
If you're just starting out and want to keep things as simple as possible, consider checking your camera settings and changing them to AEB (auto exposure bracketing) mode. AEB allows you to take a series of photos at differing exposures of your choosing so that you can later decide which exposure works best for your photo. You either check your shots on your screen as you shoot and adjust accordingly, or wait until you've uploaded them to your computer.
Here's what bracketing looks like on my camera.
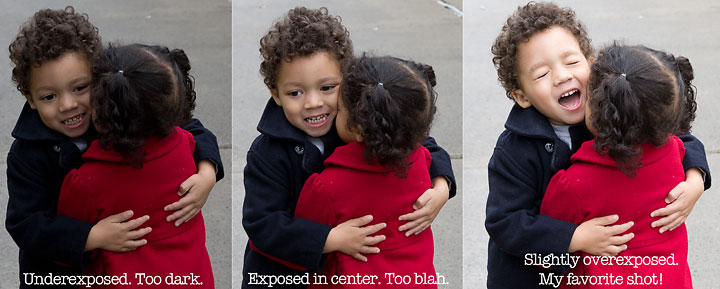
AEB shoots one exposure to the left (underexposed), one in the middle ("perfectly" exposed), and one to the right (overexposed). You can choose how far left and right you want your shots to go.
An example of three straight out-of-the-camera shots taken with the AEB setting.
The best way to nail exposure is to practice. Hopefully my tricks and secrets help you along the way.
This post is part of BlogHer's Pro Photography Tips editorial series, made possibly by Panasonic.


